Sitecore PowerShell – Find Duplicate value in item field


I come across this type of need so may time in my entire career of Sitecore Development. Where I need to find the duplicate value in item’s field. I am writing this as note to me for my own future reference. Hopping this will also help my Sitecore community.

$dictionaryItems = Get-Item -Path 'master:' -Query "/sitecore/system/Dictionary//*[@@templateid='{6D1CD897-1936-4A3A-A511-289A94C2A7B1}']" | Select-Object -Property ID, DisplayName, @{Label="DictionaryKey"; Expression= {$_['Key']}}
$uniqueCollection = $null
foreach ($item in $dictionaryItems){
    if($uniqueCollection -Contains $($item.DictionaryKey)){
        Write-Host "Duplicate Field Value found in item ID  $($item.ID)"
    }
    else{
        $uniqueCollection += $item.DictionaryKey
    }
}

Happy Sitecore PowerShelling…!!!

References

Advertisement

Configure .Net Remote Debugging Service in Sitecore 10.2 Docker


Hi Sitecorians,

It’s been very long since, I last blog. But the wait is over and I am here with some of my learning while upgrading our Siteore platform from 9.3 to 10.2( latest and greatest). With this project, there are lots of learning and I’ll try to share it with you community.

The Issue

After deploying the customisation on top of the vanilla Sitecore 10.2 (huge applaud to Developers of Sitecore and the vibrant community to create and maintain the Docker sample repository), the first obvious step is to do a quick sanity test to check whether or not anything is broken??…. and the unexpected happens, one of the custom written pipeline code was complaining and logging errors in the CM log file.

So the next best handy tool for a developer in Dot Net world is the .Net debugger( thank God). While, I was trying to attache to w3wp process of CM container the following error appeared.

Unable to connect to the Microsoft Visual Studio Remote Debugger named 'XXX.XXX.XXX.XXX'.  The Visual Studio 2022 Remote Debugger (MSVSMON.EXE) does not appear to be running on the remote computer. This may be because a firewall is preventing communication to the remote computer. Please see Help for assistance on configuring remote debugging.

The Solution

As per the error message above, it’s clear, there is something not right with the MSVSMON.EXE.

Immediately fire up following PowerShell commands to look into running processes under the CM container.

PS> Docker exec -it <<CM Container name/id>> powershell
PS> Get-Process

The output of the Get-Process command was not showing any currently running process with name msvsmon. uuhhhh… that is the issue, I guess…!!!

So to get the .Net remote debugging working on the CM container, I did checked how we had it working in our 9.3 sitecore Docker Environment. Found 3 different steps to get it working. I wanted to document is in my diary but did not got chance. It is never to late.

Lets have a look at those 3 steps one after another.

Step 1.

Open the docker-compose.override.yml file, add below line under the volumes

 cm:
    image: ${REGISTRY}${COMPOSE_PROJECT_NAME}-xp0-cm:${VERSION:-latest}
    build:
      context: ./docker/build/cm
      args:
        BASE_IMAGE: ${SITECORE_DOCKER_REGISTRY}sitecore-xp0-cm:${SITECORE_VERSION}
        SPE_IMAGE: ${SITECORE_MODULE_REGISTRY}sitecore-spe-assets:${SPE_VERSION}
        SXA_IMAGE: ${SITECORE_MODULE_REGISTRY}sitecore-sxa-xp1-assets:${SXA_VERSION}
        TOOLING_IMAGE: ${SITECORE_TOOLS_REGISTRY}sitecore-docker-tools-assets:${TOOLS_VERSION}
    volumes:
     - ${REMOTEDEBUGGER_PATH}:C:\remote_debugger:ro
Step 2.

Next step to add the REMOTEDEBUGGER_PATH variable to the .env file. To do so open your .env file in VS Code or your choice of text editor and add below line to it.

REMOTEDEBUGGER_PATH=C:\Program Files\Microsoft Visual Studio\2022\Professional\Common7\IDE\Remote Debugger\x64

Now, you need to change the path of debugger folder in above with the VS version you are using. For, now I am using VS 2022 Professional but we have some developers still using VS 2019 Professional for them the path will be C:\Program Files (x86)\Microsoft Visual Studio\2019\Professional\Common7\IDE\Remote Debugger\x64

Step 3.

Now, in the third and the final step, we will try to execute multiple processes at the entry point for CM container. To do so, I have added few commands to the existing Powershell entry point command.

 cm:
    image: ${REGISTRY}${COMPOSE_PROJECT_NAME}-xp0-cm:${VERSION:-latest}
    build:
      context: ./docker/build/cm
      args:
        BASE_IMAGE: ${SITECORE_DOCKER_REGISTRY}sitecore-xp0-cm:${SITECORE_VERSION}
        SPE_IMAGE: ${SITECORE_MODULE_REGISTRY}sitecore-spe-assets:${SPE_VERSION}
        SXA_IMAGE: ${SITECORE_MODULE_REGISTRY}sitecore-sxa-xp1-assets:${SXA_VERSION}
        TOOLING_IMAGE: ${SITECORE_TOOLS_REGISTRY}sitecore-docker-tools-assets:${TOOLS_VERSION}
    volumes:
      - ${REMOTEDEBUGGER_PATH}:C:\remote_debugger:ro
    networks:
      dev.local:
        aliases:
          - cm.dev.local
    entrypoint: powershell -Command "& Write-Host 'Starting Debugger Service...'; & Start-Process -FilePath 'C:\remote_debugger\msvsmon.exe' -ArgumentList '/nostatus', '/silent', '/noauth', '/anyuser', '/nosecuritywarn', '/wow64port 4026'; & C:\tools\entrypoints\iis\Development.ps1"

With the above alteration firstly, I am writing to host to get to know that it is trying to start debugger service and secondly executing MSVSMON.EXE file with few arguments as Start-Process powershell command.

With the argument wow64port mind that each Visual Studios have their own ports assigned as default debugging port for msvsmon.exe. See the references in section below.

Verification

As verification of both w3wp and msvsmon services running we need to check the output of Get-Process command on CM container

Note

Also make sure in the web.config of your CM container, the debug is set to true for compilation node. configuration/system.web/compilation[debug=’true’]

Note

Notice that I am using (;) semicolon as the command terminator for powershell command. If you are using CMD, use & (ampersand)

References

https://docs.microsoft.com/en-us/visualstudio/debugger/remote-debugger-port-assignments?view=vs-2022

https://ss64.com/ps/call.html

https://github.com/microsoft/DockerTools/issues/91

Sitecore SXA – Way of adding Custom Front End Assets


The Sitecore has change the website development with launch of the SXA with their first release and now they have make their vision very clear about how to quickly ship the website to market via this very powerful tool.

The Issue

While working on one of the SXA website build project, I came across one strange finding. Even if you selected Bootstrap 4 as your grid system for website. There are may out of the box bootstrap css classes are missing. This leads to some investigation ad found of the Sitecore SXA has ported just grid related styles(bootstrap-grid.css) to Sitecore SXA but not the full bootstrap main css(bootstrap.css)

Now, I have two concerns, first how can we add this the Sitecore SXA way without touching existing MVC layout or creating new layout? and Secondly, how can you only enable/import this to selective websites?

The Fix

After some googleing and reading few of Sitecore documents, found following steps will help get the answers to both above mentioned concerns.

  1. Create new base theme item of type /sitecore/templates/Foundation/Experience Accelerator/Theming/Base Theme under path /sitecore/media library/Base Themes (one can use insert options too). In my example I have given name bootstrap 411.
  2. Create a Styles folder item of type /sitecore/templates/Foundation/Experience Accelerator/Theming/Folders/Styles (one can use insert option) under the newly created base theme item above.
  3. Upload the css file to this styles folder using media upload feature. In my example I have uploaded bootstrap.css
  4. Navigate to the site specific theme item under media library. For example, /sitecore/media library/Themes/Tenant1/Website1
  5. In the Base Themes multi-select link field select the newly created base theme item in step 1 above
  6. Publish all newly created items in step 1 and 2
  7. Publish altered website specific theme item

Verification

New styles should work if the newly added stylesheet render on the page. To verify style link is render on website page or not we need to turn The Asset Optimizer off for the site (by default this is on and if it is already turned off you can skip these steps)

  1. In the Content Editor, navigate to sitecore/content/<Tenant>/<Website>/Presentation/Page Designs.
  1. In the Asset Optimization section, in the Styles Optimizing Enabled and Scripts Optimizing Enabled fields, to override styles and scripts optimization settings, select:
    • Default – to inherit global settings.
    • Yes – to always enable optimization for this site.
    • No – to always disable optimization for this site.

3. Publish the Page Design Item

4. Navigate to the web application in the browser and open the page view source and look for the newly created item path in the head section. In my example, looking for bootstrap-411(don’t mind the hyphen as it is due to link manager options settings)

<link href="/-/media/base-themes/bootstrap-411/styles/bootstrap.css" rel="stylesheet" />

Further to verify, also check other website within the same CMS and check the page source view for absence of newly added stylesheet.

In above example, we have added Style Sheet asset but this same can be done for Scripts assets as well

Happy Sitecore SXA website development…!!!

References

Sitecore Docker – Run CM sites on HTTPS


While working on the integrating Sitecore’s CM’s functionality with third party Digital Asset Management(DAM) system, I came across one interesting issue where I wanted my container applications to run on https.

The Issue

After integrating the third party DAM with Sitecore CMS, it found out that, while using local website on developer machine, the developer is not able to load the SSO login page. While loading that page below error messages logged in browser’s console.

Access to the WebCrypto API is restricted to secure origins. Compact View requires HTTPS when used outside localhost (for development).

As clearly stated I am not using localhost as host to access my cm and seems like CM needs to be securely severed over https where as we, for local development, use non secure protocol http.

The Fix

The solution is simple looking form 35,000 feet. Needs CM urls to be serving content over the secure HTTPS protocol. But when actually started digging in details, it is fun and very learning experience.

Performed following steps to achieve this on our local docker development environment.

  1. Clone or download below repository

https://github.com/michaellwest/docker-https

  1. Open the startup/createcert.ps1 for editing and change following parameter’s default value
  • $certificatepassword – from b to more secured passowrd string
  • $dnsNameList – by default the value is *.dev.local. Change this value to match your host pattern. You can specify individual host comma(,) separated.

Note

Alternatively, you can can pass those two as parameter while firing createcert.ps1 command.

3. Open docker-compose.yml file and navigate to cm service and perform following changes:

  • Add new environment parameter HOST_HEADER and set cm host value to it. If you have multiple host(this is what in my case), specify them semicolon(;) separated list. For example host1.dev.local;host2.dev.local
  • Under the volumes bind the new volume for folder startup to c:\startup path of container.
  • Under the port bind the https’s default secure port 443 with the next available container port

Note

The container host port needs to be new port which is not been use by any other services.
  • Lastly, change the entypoint to the path of startup.ps1 file under the startup folder bound under the volumes in above step for startup folder.

After all above changes to CM service of docker-compose.yml file will look something like below

services:
  ...
  cm:
    image: ${REGISTRY}sitecore-xm-cm:${SITECORE_VERSION}-windowsservercore-${WINDOWSSERVERCORE_VERSION}
    entrypoint: powershell.exe -NoLogo -NoProfile -File C:\\startup\\startup.ps1
    volumes:
      - .\src:C:\src
      - .\startup:C:\startup
    ports:
      - "44001:80"
      - "44002:443"
    networks:
      default:
        aliases:
          - cm.dev.local
          ...
    environment:
      HOST_HEADER: cm.dev.local
      ...

4. Copy folder startup and it’s content to same folder where your docker-compose.yml file is.

5. Open the powershell in elevated mode and execute following command

PS> cd <<docker-compose.yml file's folder path>>
PS> ./startup/createcert.ps1

Above powershell script will generate three files cert.cer, cert.pfx and cert.password.text under the startup folder.

This command will also generate the self-signed wildcard certificate and install to your system’s local certificate store under personal.

To verify that run mmc and open local computer certificate store.

Self signed wildcard certificate for *.dev.local

6. Now, is the time to fire up the container for sitecore. To do so run following docker compose command

PS> docker-compose up -d

After successful execution the container services will be up and one can access the host binding with https. For example https://cm.dev.local in this case.

Advance trouble shooting

  1. To check the certificate is exist after the createcert.ps1 script execution. This command can be run on both your local and against cm container as well.
PS> Get-ChildItem -Path cert:\LocalMachine\Root


PS> Get-ChildItem -Path cert:\CurrentUser\Root

  1. To verify the binding under the container’s IIS for the specified hosts use following commands
PS> Get-Website -Name 'Default Web Site'
  1. To get all the bindins and their port details for a website
PS> Get-WebBinding -Name 'Default Web Site'

References

Sitecore Docker – SQL Databse connection issue


Psssss… This is more as a note to myself..!!!

While setting my local environment for development on Sitecore 9.3 using docker, I came across below issue.

Docker - The network path was not found
Docker SQL Connection Issue
[Win32Exception (0x80004005): The network path was not found]

[SqlException (0x80131904): A network-related or instance-specific error occurred while establishing a connection to SQL Server. The server was not found or was not accessible. Verify that the instance name is correct and that SQL Server is configured to allow remote connections. (provider: Named Pipes Provider, error: 40 - Could not open a connection to SQL Server)]
   System.Data.ProviderBase.DbConnectionPool.TryGetConnection(DbConnection owningObject, UInt32 waitForMultipleObjectsTimeout, Boolean allowCreate, Boolean onlyOneCheckConnection, DbConnectionOptions userOptions, DbConnectionInternal& connection) +1341
   System.Data.ProviderBase.DbConnectionPool.TryGetConnection(DbConnection owningObject, TaskCompletionSource`1 retry, DbConnectionOptions userOptions, DbConnectionInternal& connection) +159
   System.Data.ProviderBase.DbConnectionFactory.TryGetConnection(DbConnection owningConnection, TaskCompletionSource`1 retry, DbConnectionOptions userOptions, DbConnectionInternal oldConnection, DbConnectionInternal& connection) +382
   System.Data.ProviderBase.DbConnectionInternal.TryOpenConnectionInternal(DbConnection outerConnection, DbConnectionFactory connectionFactory, TaskCompletionSource`1 retry, DbConnectionOptions userOptions) +307
   System.Data.SqlClient.SqlConnection.TryOpenInner(TaskCompletionSource`1 retry) +198
   System.Data.SqlClient.SqlConnection.TryOpen(TaskCompletionSource`1 retry) +422
   System.Data.SqlClient.SqlConnection.Open() +199
   Sitecore.Data.DataProviders.Sql.DataProviderCommand..ctor(IDbCommand command, DataProviderTransaction transaction, Boolean openConnection) +113
   Sitecore.Data.DataProviders.Sql.<>c__DisplayClass26_0.<CreateCommand>b__0() +48
   Sitecore.Data.DataProviders.NullRetryer.Execute(Func`1 action, Action recover) +293
   Sitecore.Data.DataProviders.Sql.<>c__DisplayClass29_0.<CreateReader>b__0() +30
   Sitecore.Data.DataProviders.NullRetryer.Execute(Func`1 action, Action recover) +293
   Sitecore.Data.DataProviders.Sql.SqlDataApi.CreateReader(String sql, Object[] parameters) +281
   Sitecore.Data.DataProviders.Sql.SqlDataProvider.GetContentLanguages() +169
   Sitecore.Data.DataProviders.Sql.SqlDataProvider.LoadLanguages() +133
   Sitecore.Data.DataProviders.Sql.SqlDataProvider.GetLanguages() +49
   Sitecore.Data.SqlServer.SqlServerDataProvider.ExecutePreLoadItemDefinitionSql(String sql, Object[] parameters, SafeDictionary`2 prefetchData) +52
   Sitecore.Data.DataProviders.Retryer.ExecuteNoResult(Action action, Action recover) +539
   Sitecore.Data.SqlServer.SqlServerDataProvider.LoadInitialItemDefinitions(String condition, Object[] parameters, SafeDictionary`2 prefetchData) +237
   Sitecore.Data.DataProviders.Sql.SqlDataProvider.EnsureInitialPrefetch() +333
   Sitecore.Data.DataProviders.Sql.SqlDataProvider.GetPrefetchData(ID itemId) +62
   Unicorn.Data.DataProvider.UnicornSqlServerDataProvider.GetItemDefinition(ID itemId, CallContext context) +242
   Sitecore.Data.DataProviders.DataProvider.GetItemDefinition(ID itemID, CallContext context, DataProviderCollection providers) +156
   Sitecore.Data.DataSource.GetItemInformation(ID itemID) +88
   Sitecore.Data.DataSource.GetItemData(ID itemID, Language language, Version version) +32
   Sitecore.Data.Engines.TemplateEngine.GetdefaultSectionOrder() +118
   Sitecore.Data.Engines.TemplateEngine.InternalGetTemplates() +486
   Sitecore.Data.Engines.TemplateEngine.GetTemplate(ID templateId) +184
   Sitecore.XA.Foundation.SitecoreExtensions.Extensions.DatabaseExtensions.GetContentItemsOfTemplate(Database database, ID templateId) +126
   Sitecore.XA.Foundation.Multisite.SiteResolvers.EnvironmentSitesResolver.ResolveAllSites(Database database) +63
   Sitecore.XA.Foundation.Multisite.Providers.SxaSiteProvider.GetSiteList() +162
   Sitecore.XA.Foundation.Multisite.Providers.SxaSiteProvider.InitializeSites() +105
   Sitecore.XA.Foundation.Multisite.Providers.SxaSiteProvider.GetSites() +18
   System.Linq.<SelectManyIterator>d__17`2.MoveNext() +265
   Sitecore.Sites.SiteCollection.AddRange(IEnumerable`1 sites) +221
   Sitecore.Sites.SitecoreSiteProvider.GetSites() +258
   Sitecore.Sites.DefaultSiteContextFactory.GetSites() +253
   Sitecore.XA.Foundation.Multisite.SiteInfoResolver.get_Sites() +60
   Sitecore.XA.Foundation.Multisite.Pipelines.Initialize.InitSiteManager.Process(PipelineArgs args) +85
   (Object , Object ) +9
   Sitecore.Pipelines.CorePipeline.Run(PipelineArgs args) +490
   Sitecore.Pipelines.DefaultCorePipelineManager.Run(String pipelineName, PipelineArgs args, String pipelineDomain, Boolean failIfNotExists) +236
   Sitecore.Pipelines.DefaultCorePipelineManager.Run(String pipelineName, PipelineArgs args, String pipelineDomain) +22
   Sitecore.Nexus.Web.HttpModule.Application_Start() +220
   Sitecore.Nexus.Web.HttpModule.Init(HttpApplication app) +1165
   System.Web.HttpApplication.RegisterEventSubscriptionsWithIIS(IntPtr appContext, HttpContext context, MethodInfo[] handlers) +584
   System.Web.HttpApplication.InitSpecial(HttpApplicationState state, MethodInfo[] handlers, IntPtr appContext, HttpContext context) +168
   System.Web.HttpApplicationFactory.GetSpecialApplicationInstance(IntPtr appContext, HttpContext context) +277
   System.Web.Hosting.PipelineRuntime.InitializeApplication(IntPtr appContext) +369

[HttpException (0x80004005): A network-related or instance-specific error occurred while establishing a connection to SQL Server. The server was not found or was not accessible. Verify that the instance name is correct and that SQL Server is configured to allow remote connections. (provider: Named Pipes Provider, error: 40 - Could not open a connection to SQL Server)]
   System.Web.HttpRuntime.FirstRequestInit(HttpContext context) +532
   System.Web.HttpRuntime.EnsureFirstRequestInit(HttpContext context) +111
   System.Web.HttpRuntime.ProcessRequestNotificationPrivate(IIS7WorkerRequest wr, HttpContext context) +724

The error speaks itself, that the CM and/or CD was not able to connect to underlying SQL server. SO, I immediately opens the SSMS and try to connect to my SQL server running as container on my local and I am successfully able to connect both using IP address as well as using alias(in my case it’s sql).

So what’s the issue??? When I am able to connect to SQL server running in container using outside of the Docker created network than why my CM and/or CD instance is not able to connect to it within the same network???

I check inward and outward binding ports setting in docker-compose.yml file for SQL service. Double check connection strings for server name, user name and password and that all looks correct.

Thanks to one of my colleague, who points out my docker-compose file was missing hostname for SQL server service.

I have added them to my docker-compose.yml for SQL, SOLR and XCONNECT and happy days.

The sample docker-compose.yml is as below.

version: '2.4'

networks:
  dev.local:

services:

  sql:
    hostname: sql
    image: ${REGISTRY}sitecore-xp-sxa-coveo-def-sqldev:${SITECORE_VERSION}-windowsservercore-${WINDOWSSERVERCORE_VERSION}
    networks:
      dev.local:   
    volumes:
      - .\data\sql:C:\Data
    mem_limit: 2GB
   
    ports:
      - "44010:1433"
    environment:
      SA_PASSWORD: ${SQL_SA_PASSWORD}
      ACCEPT_EULA: "Y"

  solr:
    hostname: solr
    image: ${REGISTRY}sitecore-xp-sxa-solr:${SITECORE_VERSION}-nanoserver-${NANOSERVER_VERSION}
    networks:
      dev.local:
    volumes:
      - .\data\solr:C:\Data
    mem_limit: 1GB
    networks:
      dev.local:
    ports:
      - "44011:8983"

  xconnect:
    hostname: xconnect
    image: ${REGISTRY}sitecore-xp-xconnect:${SITECORE_VERSION}-windowsservercore-${WINDOWSSERVERCORE_VERSION}
    volumes:
      - .\data\xconnect\logs:C:\inetpub\wwwroot\App_Data\logs
      - .\data\xconnect-appdata\models:C:\inetpub\wwwroot\App_Data\Models
    networks:
      dev.local:
    ports:
        - "44012:80"
    mem_limit: 1GB
    environment:
      SITECORE_LICENSE: ${SITECORE_LICENSE}
      SITECORE_SITECORE:XCONNECT:COLLECTIONSEARCH:SERVICES:SOLR.SOLRREADERSETTINGS:OPTIONS:REQUIREHTTPS: 'false'
      SITECORE_SITECORE:XCONNECT:SEARCHINDEXER:SERVICES:SOLR.SOLRWRITERSETTINGS:OPTIONS:REQUIREHTTPS: 'false'
      SITECORE_CONNECTIONSTRINGS_MESSAGING: Data Source=sql;Database=Sitecore.Messaging;User ID=sa;Password=${SQL_SA_PASSWORD}
      SITECORE_CONNECTIONSTRINGS_PROCESSING.ENGINE.STORAGE: Data Source=sql;Database=Sitecore.ProcessingEngineStorage;User ID=sa;Password=${SQL_SA_PASSWORD}
      SITECORE_CONNECTIONSTRINGS_REPORTING: Data Source=sql;Database=Sitecore.Reporting;User ID=sa;Password=${SQL_SA_PASSWORD}
      SITECORE_CONNECTIONSTRINGS_XDB.MARKETINGAUTOMATION: Data Source=sql;Database=Sitecore.MarketingAutomation;User ID=sa;Password=${SQL_SA_PASSWORD}
      SITECORE_CONNECTIONSTRINGS_XDB.PROCESSING.POOLS: Data Source=sql;Database=Sitecore.Processing.Pools;User ID=sa;Password=${SQL_SA_PASSWORD}
      SITECORE_CONNECTIONSTRINGS_XDB.REFERENCEDATA: Data Source=sql;Database=Sitecore.ReferenceData;User ID=sa;Password=${SQL_SA_PASSWORD}
      SITECORE_CONNECTIONSTRINGS_COLLECTION: Data Source=sql;Database=Sitecore.Xdb.Collection.ShardMapManager;User ID=sa;Password=${SQL_SA_PASSWORD}
      SITECORE_CONNECTIONSTRINGS_SOLRCORE: http://solr:8983/solr/sitecore_xdb
    depends_on:
      - sql
      - solr

Sitecore Publishing Service – Part 1 – Install and Configure Service in Azure PaaS


While working on finding solution for slow publishing issue of more than 10,000 items in Azure PaaS, I came across this very powerful add-on Sitecore Publishing Services.

Believe it or not but once it is installed, configured and up, it reduced the publishing time drastically. In our case, publishing of those 10,000 items were taking around 1 hour 30 mins(hhhuuuffff…), merely took 12 mins to publish.(Super duper awesome, isn’t it…??? This makes everyone’s life easy)

Thus, I decided to write blog on whole solution. Blog will become very lengthy if I put everything in one. Thus, splitting it in three parts.

Part 1 will cover installation and basic configuration of publishing service. Part 2 will cover installation of publishing module in CMS. The third part will cover advance configuration of publishing service.

So, lets get started…

Download

You can download both Sitecore publishing service and publishing module from Sitecore’s development site here. It is the designed and developed by Sitecore itself.

Note:

Just check the version compatibility with Sitecore version where you wanted to implement this publishing service/module. see image below for more details. (As I have downloaded first the latest and greatest version 4 at the time I am writing this blog for Sitecore 9.0.1 and later figure out it is not compatible.)

Install publishing service on Azure PaaS

With my current client all their Sitecore implementation is in Azure PaaS. It absolutely makes sense to have this Sitecore Publishing service also setting in Azure PaaS. So, follow below steps to get the publishing services up as app service.

  • Download the service application as zip file from above link. Select the one which is matching your host architecture type either 32 bit or 64 bit.
  • Open Kudu – Advance tool for the web app where you want to host publishing service
  • in Kudu editor open command console by navigate to Debug Console menu option and select CMD
  • navigate to site root folder using following command
cd site\wwwroot
  • Drag and drop service zip file to folder view area above console. This will upload the service package to Azure web app.
  • Once upload completed, run following command on console below the folder view
unzip -o *.zip

Assumption

The site’s wwwroot folder has only one zip file which is recently uploaded publishing service zip file.
  • Once unzipping of application completed, execute following commands in CMD. This will set connection stings of core, master and web database in publishing service. Going forward, these connection strings will be used for all publishing jobs.
Sitecore.Framework.Publishing.Host configuration setconnectionstring core "<core database connection string>"
Sitecore.Framework.Publishing.Host configuration setconnectionstring master "<master database connection string>"
Sitecore.Framework.Publishing.Host configuration setconnectionstring web "<web database connection string>"
  • Once connection strings are configured for these databases the next step is to upgrade the database schema to required one for Sitecore publishing service
Sitecore.Framework.Publishing.Host schema upgrade --force

After executing above command the console displays the result of the command. The below screenshot have result with already updates schema for all the databases as I have previously upgraded the schema.

Once above commands are successfully executed, now it is the time to check the status of the publishing service web application.

In the browser open below URL

http://<<azure app service name>>.azurewebsites.net/api/publishing/maintenance/status

Above web api will return following JSON result if all the configurations are correctly set.

{
    "status": 0
}

This are basic steps to deploy Sitecore Publishing services up and running in azure PaaS. In the Part – 2, will cover installation of Sitecore Publishing Module in Sitecore CM/CA with configuration.

Sitecore config patching overridden for Azure…!!!???


Hi Folks,

Recently, I been struck by an issue where my config patches were not reflecting in Test environment. Not to mention, it is working absolutely fine in my local as well as on CI(typical developer’s excuse).

After initial investigation found, it is patching all of the config changes from my custom config patch file but not the particular one where I was overriding the Sitecore’s OOTB logging functionality to log error and fatal to Azure Application Insight(know as AppInsight).

For our deploying artifacts to test environment(which is Azure PAAS), we are using another great tool by Sitecore called Sitecore Azure Module(currently known as Sitecore Azure Toolkit).This is the one which is compatible with Sitecore 8.1. With this in place, my whole focus is shifted to this tools functionality and internal processing.

After thorough investigation of this tool and it’s architecture, I found the root cause of the config not patching issue(or I say config patching overriding issue). The module’s configuration item of template type /sitecore/templates/Azure/Deployment/Azure Deployment has a field call Global WebConfig Patch which has title text as [Do not edit!] – Global Web Config Patch (These are the global web config patches that will always be applied to every deployment). This field holds all the configurations for Sitecore XP to work in Azure PAAS environment.

Sitecore Azure Module Deployment Configuration Item

While we trigger the command to Upgrade Files in Sitecore Azure Module Window, it start packaging all the required files and also configurations. As part of Sitecore configuration packaging, it gets the whole patched output of all config files and after that is applies the config changes mentioned in the Global WebConfig Patch field of the above mentioned template under your Environment/location/Farm/WebRole item of your module configuration. The whole config path is finally written in single Sitecore.config file.

Tip: Be cautious while changing this global setting of Sitecore Azure module. Don’t do it until and unless you are knowing what are you doing.

Happy Deployment…!!!! 🙂

Content sync with RAZL script


Hi Sitecore Enthusiastic,

Recently come across very great strategy to sync content between two instances of Sitecore using a very powerful tool called Razl form Hedgehog.

Please read more about Razl here.

I have used this tool before mainly to compare the content between two different databases. For example production CM and Pre-production CM. Today, I came across very new and great features with latest version of Razl offering call tasks and executing task using Razl scripts.

It is offering content sync tasks to be exported in a file(or call script) as xml format and later one can use that to sync data in different environment using Razal script.

For more information about Razl task, read official document here.

The great part of this task is you can cherry pick what you want to sync out of the whole Sitecore content tree. You can go deep up to the field level with your sync task.

once you have a list of tasks ready, you simple can export that as script and execute it with command or create scheduler task to run that script using command and it will do the sync between source and target connections.

Razl.exe /script:Migrate.xml
Razl.exe /script:"c:\Site Migration\Razl.xml"

Even if you want to go one level further you can automate this sync task post publishing(perhaps not ideal, if frequent publishing is happening) or you can hook it post deploy task in you CD script(if your build contains TDS/unicorn content items).

You must be wondering this is great tool and great way to sync, but what if I am trying to sync big chunk of content items!!!???.
You can use another great feature of Razl called Lightening Mode(obviously you can configure this in you script as well). This mode really boost the performance of sync script if your CoplyAll task is configured to do bulk copying of items.

As far as logging concern, Razl Script mode will output actions as they happen to the command prompt, this output can be written to a text file if required using following command sample.

Razl.exe /script:"c:\Site Migration\Razl.xml" >> c:\logs\RazlScriptLogs.txt

Tip: Single arrow > will create the file if missing and if exist, overwrite the content of file.
Double  arrow >> will create the file if missing and if exist, it will append to the file.

If a log folder has been already configured in the Razl GUI than Script mode will also write to the log file under configured log folder.

Thanks for reading.

Happy Content Sync…!!!

Reference
Script – https://hedgehogdevelopment.github.io/razl/script.html
Connections – https://hedgehogdevelopment.github.io/razl/connections.html
Lightning mode – https://hedgehogdevelopment.github.io/razl/comparing.html#lightning-mode

Habitat – Profile tracking issue post installation


After installing Habitat for Sitecore on local development environment form https://github.com/HedgehogDevelopment/Habitat/tree/TDS-latest (scroll down for installation instructions), it found that site’s pages gives below error:

Server Error in '/' Application.
Value cannot be null.
Parameter name: source
Description: An unhandled exception occurred.

Exception Details: System.ArgumentNullException: Value cannot be null.
Parameter name: source

Source Error:

Line 64: private IEnumerable GetHistoricalOutcomes()
Line 65: {
Line 66: return this.outcomeManager.GetForEntity(new ID(Tracker.Current.Contact.ContactId));
Line 67: }

habitat-for-tds-profile-tracking-issue

The solution is set the value of Xdb.Tracking.Enabled to false in C:\websites\Habitat.dev.local\Website\App_Config\Include\Sitecore.Xdb.config file

Hit the refresh in browser for the habitat page and bang.

Here I am assuming, the local environment is configured as CMS-only mode.

Ongoing publishing issue with Sitecore 7.2


Here I wanted to share simple solution to an ongoing issue of publishing with Sitecore 7.2 with my company. It is such a simple solution but took lots of efforts and time to get to it. Thought to share it so that if someone is facing same kind of issue, can be benefited out of it.

The problem:

Out marketing team(who is also responsible for the content management) continuously reporting us with the issue of publishing. They mentioned that whenever we try to publish any item, the publishing took lot of time to finish. Most of the time publishing dialog stuck at Initialization stage. This issue sometimes go worst, even after waiting for half an hour to 45 minutes the publishing dialog still shows initialization and we need to ask web admin guys to re-cycle application pool and start publishing again(this is worst case scenario).

Publishing Dialog Initalizing

So as a first step, I asked them to avoid bulky publishing. I also suggested then to avoid using publishing related items rather go to individual items changed and only publish those items. The reason is to minimize items count in publishing which keeps publishing process as short as possible and keep them moving.

Even though content authors follow my suggestions, the issue still persist. So we started investigating even more. We planned to take help of Sitecore support personal who visiting us once every month. He suggested us to compare all the config files with pure vanilla version and along with all the other files and folder so we can be absolute sure we are having all the goodies what should be there. After this huge activity we identified couple of missing files and configurations in both CM and CD environments.

So we have gathered all those missing pieces and deployed to the respected environments.

After this we have reported a side effect from marketing, that what ever we are deploying to Fail-over publishing target(which is our DR cum internal Preview servers) it also eventually published to production(which is very strange to us and this was not the behavior before we deploy the missing bits).

Root cause

So, I started investigating in context to new side effects. While going through the log file for CM server, my eyes struck with an strange log entry which looks something like below.

5768 2016-03-10 11:03:57 INFO AUDIT (ad\paragd): Execute workflow command. Item: master:/sitecore/content/Site1/Home/test, language: en, version: 11, id: {23005A37-6BB5-4025-AC5B-047A8D3F3719}, command: /sitecore/system/Workflows/Site1 Workflow/Draft/Submit, previous state: Draft, next state: /sitecore/system/Workflows/Site1 Workflow/Awaiting Approval, user: ad\paragd
ManagedPoolThread #3 2016-03-10 11:03:59 INFO Starting update of index for the database 'master' (1 pending).
ManagedPoolThread #3 2016-03-10 11:03:59 INFO Update of index for the database 'master' done.
ManagedPoolThread #16 2016-03-10 11:03:59 INFO Starting update of index for the database 'master' (1 pending).
ManagedPoolThread #16 2016-03-10 11:03:59 INFO Update of index for the database 'master' done.
5284 2016-03-10 11:04:00 INFO AUDIT (ad\paragd): Execute workflow command. Item: master:/sitecore/content/Site1/Home/test, language: en, version: 11, id: {23005A37-6BB5-4025-AC5B-047A8D3F3719}, command: /sitecore/system/Workflows/Site1 Workflow/Awaiting Approval/Approve, previous state: Awaiting Approval, next state: /sitecore/system/Workflows/Site1 Workflow/Approved, user: ad\paragd
5284 2016-03-10 11:04:00 INFO AUDIT (ad\paragd): [Publishing]: Starting to process 2 publishing options
4572 2016-03-10 11:04:00 INFO HttpModule is being initialized
568 2016-03-10 11:04:00 INFO HttpModule is being initialized
5456 2016-03-10 11:04:01 INFO Job started: Publish
2736 2016-03-10 11:04:01 INFO Job started: Publish to 'web'
.
.
.
2736 2016-03-10 11:04:01 INFO Job ended: Publish to 'web' (units processed: 11)
7052 2016-03-10 11:04:01 INFO Job started: Publish to 'web_Failover'
.
.
.
7052 2016-03-10 11:04:02 INFO Job ended: Publish to 'web_Failover' (units processed: 11)

Above lines, I found in the log just above the log line for manually triggering of publishing just for the single publishing target which is “fail-Over”.

4392 2016-03-10 11:04:18 INFO AUDIT (ad\paragd): Publish item: master:/sitecore/content/Site1/Home/test, language: en, version: 11, id: {23005A37-6BB5-4025-AC5B-047A8D3F3719}
3600 2016-03-10 11:04:28 INFO AUDIT (ad\paragd): Publish, root: {23005A37-6BB5-4025-AC5B-047A8D3F3719}, languages:en, targets:WWW_Failover, databases:web_Failover, incremental:false, smart:true, republish:false, children:false, related:false
3600 2016-03-10 11:04:28 INFO AUDIT (ad\paragd): [Publishing]: Starting to process 1 publishing options
2864 2016-03-10 11:04:29 INFO Job started: Publish
5240 2016-03-10 11:04:29 INFO Job started: Publish to 'web_Failover'

Solution

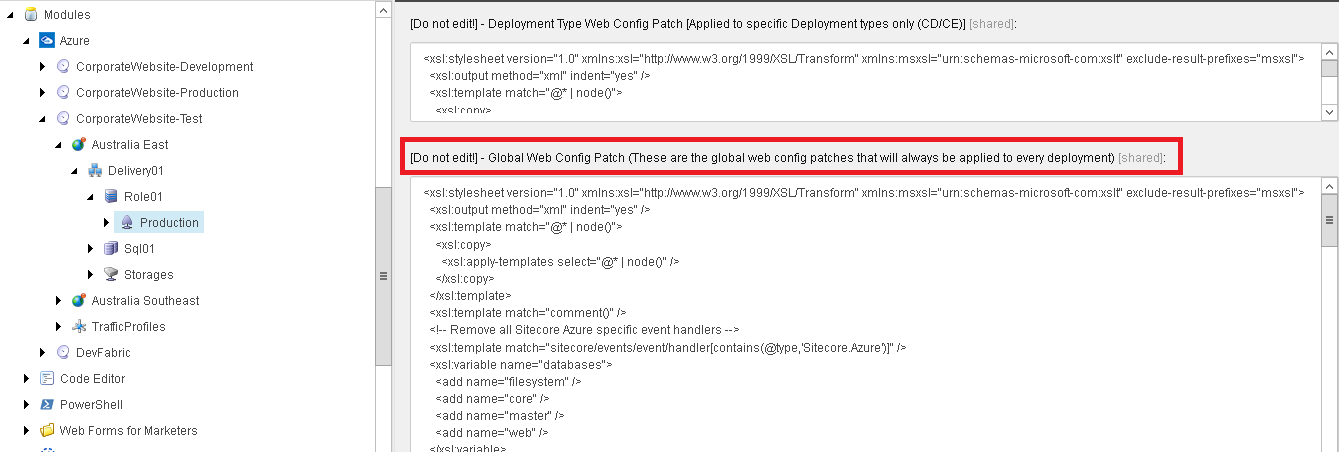
From above behavior on the log file, it was clear that the workflow has to do something with this. When I checked the default workflow assigned, I found that there is an auto publishing action configured with final stage of the workflow as shown in below screen grab.

Auto publishing action item configuration

But alone having auto publish action configured, should not be making publishing this slow. So I have investigated more and found the real culprit.

The auto published action is configured with deep=1 as parameters.
So now, I have dive into the de-compiled code and found this is very dangerous parameter configured with auto publishing action.
Having deep parameter set, you are instructing auto publisher to publish everything underneath the selected item(approving item here) to every publishing targets(in this case 2 targets).

So, if you are approving leaf node/item, the auto publishing will be quick as it will only publish that node along with no child. But if you are approving, lets say home node of the site, you are actually publishing not just that root home item but pretty much the whole site to all available publishing targets…!!!(Very shocking…isn’t it?).

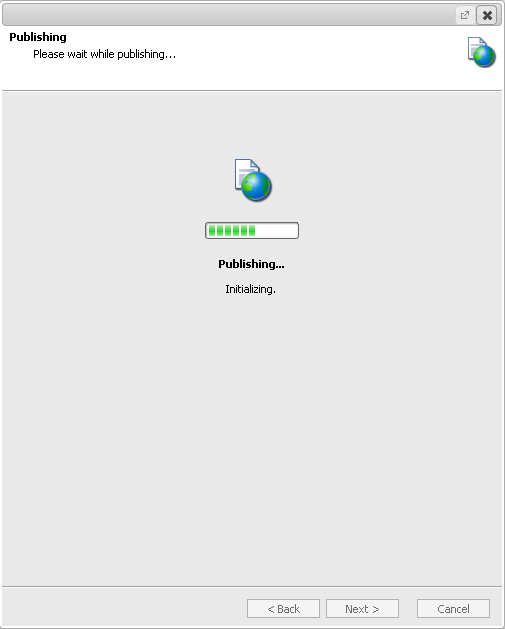
So now after approving the item, when you trying to publish that home node to selected target, it always queue up in the publishing queue and Sitecore publishing dialog box show you Initialization message screen as shown above. The item publishing will be picked up when previous auto publishing job is done. This is the case with just one editor, if you have 5-6 content editor, then the situation can go into really worst.

So the easy solution is to remove that auto publishing action item which was publishing lot of unwanted items to all targets in background without any visible signs.

So we did that and everyone is happy ever after…..

But the story does not ended here. I was thinking while going to home that day, when the auto publishing action was configured and present with default workflow since the edges then why approving the item wasn’t picked by both the CD servers?

So next day, I have kept my investigation going and discover the ScalabilitySettings.config file which was missing on all CD servers. While deploying the missing configurations and file we have deployed this file on all CD serves started picking the events execution for all CDs.

So, happy publishing….!!!!

Reference

https://sitecorebasics.wordpress.com/2011/05/28/is-your-sitecore-publishing-stucks/